Gold foil can make a clothbound book look quieter, not louder. A small title catching the light on linen may do more for an edition than a cover crowded with printed effects.
It can also fail in ways that are difficult to hide. Thin strokes break across the weave. Small counters close. A large solid area develops pinholes. Foil transfers cleanly on the front board but weakens near the joint. A rose-gold sample looks warmer or flatter than the designer expected.
These defects are often blamed on “insufficient pressure” or “bad artwork.” That diagnosis is incomplete. Foil stamping on book cloth is a matched system:
cloth surface + foil grade + die + artwork + makeready + heat + pressure + dwell time + production speed
Change one part and the usable settings can change with it. A die that gives crisp lettering on coated paper may not reproduce the same detail on open-weave cloth. A foil selected for a large solid area may release differently from one intended for fine type. More heat or pressure may improve one defect while creating another.
For buyers who already know they want a tactile casebound edition, PrintPack360’s custom cloth-bound hardcover book printing page shows the relevant material, binding and finishing route. This article goes deeper into the point where many premium covers succeed or fail: making the foil design compatible with the actual covering material.
Table of Contents
Start With the Defect, Not the Machine Setting
The visible symptom usually narrows the investigation, but it rarely proves a single cause.
| What you see | Common contributing factors | First checks |
|---|---|---|
| Broken strokes or small bare spots | Coarse weave, unsuitable foil adhesive, low or uneven transfer, contaminated surface | Confirm cloth code and foil grade; inspect pressure distribution; test a small parameter range |
| Counters or gaps filling in | Artwork too tight, excessive heat, pressure or dwell, overly soft makeready, foil release not suited to detail | Inspect the die and artwork; reduce variables systematically; separate fine detail from solids if necessary |
| Pinholes in a large solid area | Surface valleys, insufficient contact, foil/substrate mismatch, uneven makeready | Test a foil suited to textured stock; review coverage and pressure uniformity |
| Heavy indentation around the foil | Excess pressure, soft backing, heat-sensitive or compressible covering material | Confirm whether a recessed impression is intended; adjust makeready and settings |
| Foil rubs or lifts | Poor adhesion, incompatible or contaminated surface, insufficient transfer, handling before stabilization | Test adhesion on the actual material; review storage and handling; retain samples |
| Position varies across cases | Case placement, die registration, board or wrap variation, joint geometry, feeding consistency | Measure from agreed reference points; inspect first-off and samples throughout the run |
| Shade looks wrong | Foil selected from a screen image, dark cloth influencing a non-opaque foil, different finish or viewing angle | Approve a physical foil reference on the selected cloth under agreed lighting |
The table is a diagnostic starting point, not a recipe. Temperature, pressure and dwell settings should be established by the finisher for the chosen material, foil, die and equipment. Publishing a universal setting would be convenient and misleading.
What Hot Foil Stamping Actually Transfers

In conventional hot stamping, a heated die presses the foil construction against the substrate. Heat and pressure activate release and adhesive layers so that the decorative coating separates from its carrier and bonds in the shape of the die.
Foilco’s technical explanation of the structure of stamping foil distinguishes the carrier, release coat, color or lacquer, metallic layer where applicable, and adhesive. The release system influences whether a foil is suited to fine detail or larger coverage; the adhesive must bond to the selected surface.
That is why “gold foil” is not a complete production specification. Gold describes a visual family. It does not identify:
- the foil manufacturer and reference;
- metallic, satin, matte, pigment, holographic or other finish;
- shade and opacity;
- release characteristics;
- intended substrate and machine type;
- suitability for fine detail or broad solids.
The same warm-gold appearance may require different foil grades on coated paper, paper-backed linen and PU. A purchasing specification should retain the approved foil reference rather than describing it only as “gold” or “rose gold.”
Book Cloth Is Not One Surface
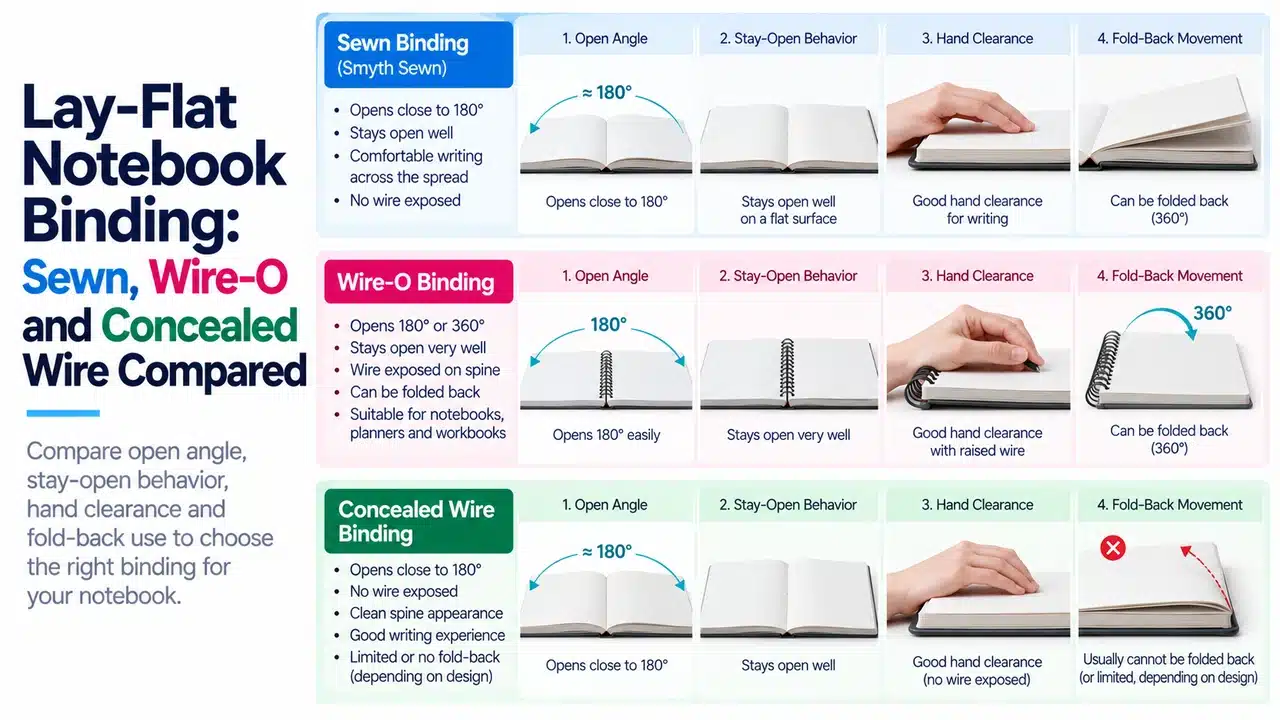
“Book cloth” covers a wide material range. Some products are woven textiles with visible yarn intersections. Some have coatings that partly fill or seal the weave. Others are paper-based materials embossed to resemble cloth, or PU cover materials with their own heat response and compressibility.
Winter & Company’s material selector, for example, allows users to filter cover materials by application and whether they are compatible with hot foil stamping. That information is useful for shortlisting. It does not remove the need to test the exact color, surface and design.
Five material properties matter especially:
1. Surface topography
Foil is extremely thin and follows the landscape beneath it. Foilco notes in its guidance on paper and substrate structure that textured or uncoated surfaces may require a foil with a thicker adhesive to reach into surface irregularities.
On pronounced cloth, the high points of the weave contact first. Fine foil lines may bridge a valley or break at yarn intersections. More pressure can push the foil farther into the texture, but it may also widen detail, deepen the impression or mark the case.
2. Surface treatment
A coating can improve smoothness and reduce fibre interference, but compatibility still depends on surface chemistry and the foil adhesive. Treatments, release agents, dust, oil or handling contamination can affect transfer.
The material supplier’s technical data and the foil supplier’s substrate recommendations should be checked together. “Foil stampable” on a swatch card is a starting condition, not the finished-cover approval.
3. Compressibility
Soft or padded surfaces deform more readily beneath the die. That can produce an attractive recessed mark, but it can also close fine counters or create an uneven halo around the image. Board, cloth, adhesive, case construction and makeready all contribute to the effective support beneath the die.
4. Color and optical contrast
Reflective gold or silver usually creates strong contrast against dark cloth. Pigment, pearlescent, translucent and some specialty foils may be influenced more visibly by the substrate. Foil should therefore be approved as a physical impression on the chosen color, not from an online swatch.
5. Heat response
Traditional cloth, coated textiles and PU do not respond identically to heat. Some materials may polish, darken, flatten or show a stronger impression. The test should check both the transferred foil and the surrounding surface.
Buyers still deciding between a tactile cloth case and a printed wrap can first compare book cloth versus a printed paper case. A smooth laminated paper wrap generally offers different detail and image possibilities; cloth trades some graphic freedom for texture and material presence.
Fine Artwork and Large Solids Want Different Things

A cover may contain an author name in small serif type, a hairline ornamental border and a broad metallic title. Visually they belong together. Mechanically, they do not necessarily want the same foil, release behavior or press settings.
Foilco’s fine-detail foiling guidance warns that smaller detail and tighter gaps are more likely to fill. It also advises avoiding dies that combine very fine elements with very large solid areas where possible.
The conflict is easy to understand:
- Fine lines and open counters need restraint and clean release.
- Large solids need uniform contact and enough transfer across the whole area.
- Coarse cloth increases the challenge because both must bridge the same surface variation.
If the design cannot be simplified, splitting it across two dies or two passes may create a larger workable window. That adds tooling and setup, and it may introduce a registration relationship between the passes. It should be treated as an engineering decision, not an automatic upgrade.
There is no universal minimum line width
A fixed statement such as “all foil lines must be at least 0.25 mm” sounds reassuring but ignores the substrate, foil, die, press and operator. Foilco notes that skilled finishers can achieve very fine results in suitable conditions. That should not be converted into a guarantee for a coarse woven case.
The more reliable workflow is:
- Supply vector artwork at final size.
- Identify the narrowest positive line, smallest reversed gap and tightest counter.
- Show the finisher the actual cloth code.
- Enlarge, open or simplify vulnerable details before tooling where necessary.
- Test the difficult elements together on the production material.
Type should be evaluated as shapes
Font size alone does not predict foil performance. A 10-point typeface with open counters and sturdy strokes may stamp more cleanly than a 14-point high-contrast serif with hairlines. Inspect letters such as a, e, B, R, P and numerals with small enclosed spaces. Also inspect punctuation, diacritics and reversed type inside foil areas.
Convert the approved foil artwork to vectors or outlines for production, but retain an editable source file. Outlining prevents font substitution; it does not fix weak geometry.
The Press Has Three Main Controls, Not One
Foil transfer is commonly adjusted through temperature, pressure and dwell time. Machine speed affects the practical dwell relationship. Foilco’s Foil Academy emphasizes these variables, along with substrate, foil grade, die and makeready.
Temperature
Heat activates the release and adhesive system. Too little may produce incomplete transfer. Too much can encourage filling, alter the covering material, create excess release or reduce edge definition. Fine detail often uses a different working window from large solids.
Pressure
Pressure brings die, foil and substrate into contact. Textured cloth may need enough pressure to reach across its relief, but excessive pressure can crush texture, widen strokes or leave an unwanted impression.
Dwell time and speed
The foil and substrate need contact for long enough for transfer to occur. A change in machine speed can require a change in temperature or another setting. This is one reason a sample made by a different process cannot silently become the bulk standard.
Makeready
Makeready is the supporting preparation beneath the stamping area. Its hardness, resilience and evenness affect pressure distribution and definition. Foilco describes firm, flat materials for fine work and other systems for different applications. The correct choice belongs to the production finisher because it depends on the case build, press and desired impression.
A good setup is not the highest combination of heat and pressure that makes foil appear. It is the most stable operating window that transfers the design without damaging detail or the material.
A Real Specification Question: Foil Impression or Separate Deboss?

An anonymized PrintPack360 journal brief called for an A5 sewn hardcover with approximately 200 pages, cream writing paper, a PU case and soft light rose-gold foil. The cover also included functional details such as a ribbon, elastic closure and paper pocket.
During specification review, one distinction mattered: hot foil pressure on PU naturally creates some visible indentation. That impression can look tactile, but it is not automatically the same as a separately controlled deboss.
The two routes should be described differently:
| Intended result | Likely specification question |
|---|---|
| Metallic image with a slight natural impression | Can the approved foil transfer create enough tactile definition on this PU without a separate operation? |
| Clearly recessed shape with controlled depth | Is a separate deboss die or pass required, and how will it register with the foil? |
| Blind recessed mark without metallic color | Should this be specified as blind debossing rather than foil stamping? |
| Sculpted or multi-level relief | Is specialist tooling practical for the artwork, material, quantity and budget? |
The buyer should not pay automatically for an extra process that does not improve the intended result. Equally, a designer expecting a pronounced, consistent recess should not assume normal foil pressure will create it.
The correct decision comes from an approved test on the actual cover material, viewed from several angles and handled as a book cover will be handled.
The Most Efficient Proofing Sequence
Ordering a complete bound sample first is not always the fastest way to solve a difficult foil design. A staged sequence isolates the variables.
Stage 1: Material and foil shortlist
Select the likely cloth colors and textures. Obtain physical material and foil references. Confirm availability, batch considerations and whether the supplier recommends the combination for hot stamping.
Stage 2: Artwork risk strip
Create a compact test die or test layout containing the actual production risks:
- smallest title and spine type;
- thinnest positive stroke;
- smallest reversed gap;
- representative solid area;
- border intersections;
- logo or illustration detail;
- foil beside or over any deboss relationship.
Stamp the strip on the shortlisted materials. This is more useful than testing a generic logo that does not resemble the final artwork.
Stage 3: Full cover panel or case test
After selecting the combination, test the actual front, spine and back layout at final size. Check position relative to board edges, joints and spine. A flat cloth swatch cannot fully reveal case-placement or joint behavior.
Stage 4: Finished bound sample
Review the foil as part of the complete object. Check cover alignment, spine centering, opening, handling, packing contact and any interaction with a belly band, jacket or slipcase.
Stage 5: Golden Sample and first-off production
Give the approved sample a project ID, revision and date. Record the cloth code, foil reference, die version and any sample-production substitutions. At bulk setup, compare first-off cases with that controlled reference before the full run continues.
PrintPack360’s sample strategy explains when to use material swatches, finish tests, dummies and finished samples. The important point here is that a PDF can approve foil position, but only a physical test can approve foil behavior on cloth.
What to Inspect Before the Run Leaves the Foil Press

Foil quality should not be judged from one attractive case selected at the end. Establish the reference at setup and sample across production.
On the approved first-off case
- Compare foil shade and finish with the approved physical reference.
- Inspect fine strokes and counters under consistent light.
- Check solids for pinholes, voids, streaks and uneven reflectivity.
- Check the surrounding cloth for scorching, polishing, unwanted indentation or adhesive marks.
- Measure position from agreed case references, not from a photograph.
- Inspect front, spine and back separately where more than one area is stamped.
- Confirm that the case still wraps, folds and joints correctly.
During production
- Pull samples from different points in the run.
- Watch for progressive die contamination, wear or heat drift.
- Compare registration and transfer across positions on the press sheet or case.
- Separate setup waste and rejected cases so they cannot enter binding.
- Retain representative approved and rejected samples for defect communication.
After casing-in and packing
- Check whether foil near the joint cracks, rubs or distorts during opening.
- Confirm spine artwork remains visually centered on the finished book.
- Test packaging contact points for abrasion.
- Inspect books from multiple cartons rather than only the top of one carton.
There is no universal rub count or adhesion test that suits every foil-on-cloth project. If a brand or retailer requires a specific durability method, define it before sampling and make sure the approved sample is tested by that method.
Foil-on-Cloth Decision Table
| Design priority | Better starting direction | Main risk to prove |
|---|---|---|
| Very small type or fine line work | Smoother, foil-compatible cloth; foil grade intended for detail; simplified artwork | Filled counters and broken hairlines |
| Broad mirror-metallic title | Uniform surface; foil and makeready suited to solids | Pinholes, patchy transfer and visible surface texture |
| Strong tactile recess | Compressible material or planned deboss route, tested at final size | Crushed texture, halo and inconsistent depth |
| Coarse natural linen appearance | Accept texture as part of the result or reduce artwork complexity | Interruption across the weave |
| Foil on the narrow spine | Robust type, confirmed spine width and case-position tolerance | Visual miscentering and joint interference |
| Foil plus separate deboss | Separate vector layers and registration plan | Double-image edges and process-order conflict |
| Multiple foil colors | Separate plates/passes and approved physical references | Pass-to-pass registration and added setup cost |
| Repeat edition months later | Retained sample plus cloth and foil references | Material-batch and foil-shade drift |
This table is meant to frame a supplier discussion. It does not replace a test because apparently similar black linens, gold foils or PU materials may behave differently.
Artwork and Quotation Checklist
Provide the following before requesting a reliable quotation:
Artwork
- Vector foil artwork at final size.
- Foil represented as a named spot-color layer, not a CMYK metallic effect.
- Separate layers for each foil color, blind deboss, emboss or other finish.
- Clear positive and reversed elements.
- No unintended transparency, gradient or raster edge in a conventional die-stamping layer.
- Final front, spine and back positions based on the confirmed case template.
Materials and appearance
- Exact cloth or PU reference, color and supplier where already selected.
- Physical foil reference or target family: shade, reflectivity and finish.
- Statement of whether cloth texture should remain visible through the foil.
- Intended impression: visually flat, naturally pressed or separately debossed.
- Reference sample or photograph identified as inspiration, not an automatic production standard.
Commercial specification
- Finished book size, page count and quantity.
- Square or round spine and confirmed binding structure.
- Foil dimensions and number of stamping positions.
- Number of foil colors or separate passes.
- Required test, finished sample and retained sample.
- Inspection, packing, destination and delivery requirements.
The foil area matters because tooling, setup and press coverage are part of the cost. So do the number of dies and passes. Buyers comparing the broader finish budget can use PrintPack360’s hardcover book finishing guide and hardcover printing cost guide before freezing the cover design.
FAQ
Can every book cloth be foil stamped?
No. Many book-cover materials are designed for hot foil stamping, but compatibility and achievable detail vary. Confirm the exact material code and test the intended foil and artwork before bulk production.
Why does gold foil look broken on linen cloth?
The foil may be contacting the high points of the weave but not transferring consistently into surface valleys. Foil grade, adhesive, pressure distribution, temperature, dwell, makeready and artwork width may all contribute. The defect should be diagnosed on the actual material rather than corrected by pressure alone.
What is the minimum line thickness for foil stamping on cloth?
There is no responsible universal minimum. A workable line depends on cloth texture, foil, die, machine, makeready and surrounding artwork. Ask the finisher to review the smallest strokes and gaps at final size, then approve a physical test.
Should fine details and large foil areas use the same die?
They can in some designs, but they may require conflicting transfer conditions. If the operating window is too narrow, simplify the artwork or separate fine and solid areas into different dies or passes. Test the registration and added cost before approving that route.
Does foil stamping automatically create a debossed effect?
Hot stamping pressure often leaves some impression, especially on compressible PU or soft uncoated materials. It does not guarantee the depth or definition of a separate deboss. Specify the intended appearance and approve an actual material test.
What should be recorded for repeat foil-stamped editions?
Keep the approved sample ID, cloth supplier and code, foil manufacturer and reference, die revision, artwork file, acceptable defects and inspection record. If material batches or equipment change, repeat the relevant setup checks instead of relying only on the previous order name.
Build the Cover Around the Material, Not a Render
The most dependable foil-stamped cloth covers are not the ones with the most decoration. They are the ones where material, artwork and process support the same visual idea.
Send the final book format, quantity, cloth preference, foil artwork and target appearance together. PrintPack360 can review the project through its custom gold foil hardcover book printing and hardcover book printing routes, then define which material test, cover proof or bound sample is appropriate before bulk production.